This post was most recently updated on January 9th, 2024.
7 min read.This article describes some of my experiences with Airthings air quality sensors, especially when used with Home Assistant. I’m using a couple of sensors to keep an especially close eye on CO2, Radon and air pressure, in addition to temperature and humidity (which I already have plenty of Sonoff sensors for). As a nice bonus, both sensors I got also monitor VOCs.
Background
I have an older house, so I was fairly certain it has some air quality issues. An older device I have already measures PM2.5, which has pretty much been a non-issue, but I couldn’t find many affordable CO2 or Radon sensors that would have Home Assistant integration. Then Airthings Wave Mini + Plus -combo became available for a discounted price (~200€), so I ended up grabbing it for a test drive.
As a background, for CO2 I wanted a device I can take wherever I go, but also just hook it up on the wall and leave it to measure the air quality at home. So not just a CO2 gadget on the go, but also an actual ongoing measurement.
So how well do Airthings sensors fare? The short answer is that they’re pretty well-rounded and do the trick, but they’re definitely not the most convenient fixed sensors to have in the house, and neither are they the best ones to carry around with you.
But let’s take a closer look at those 2 topics one by one.
Can you take your Airthings sensors with you?
The short answer is yes. They’re very mobile and the company at least claims an incredibly impressive battery life for their little disc-shaped gadgets – up to 2 years! I doubt that’s accurate – my Wave Mini is already down to 85% or so after a month. But we’ll see.
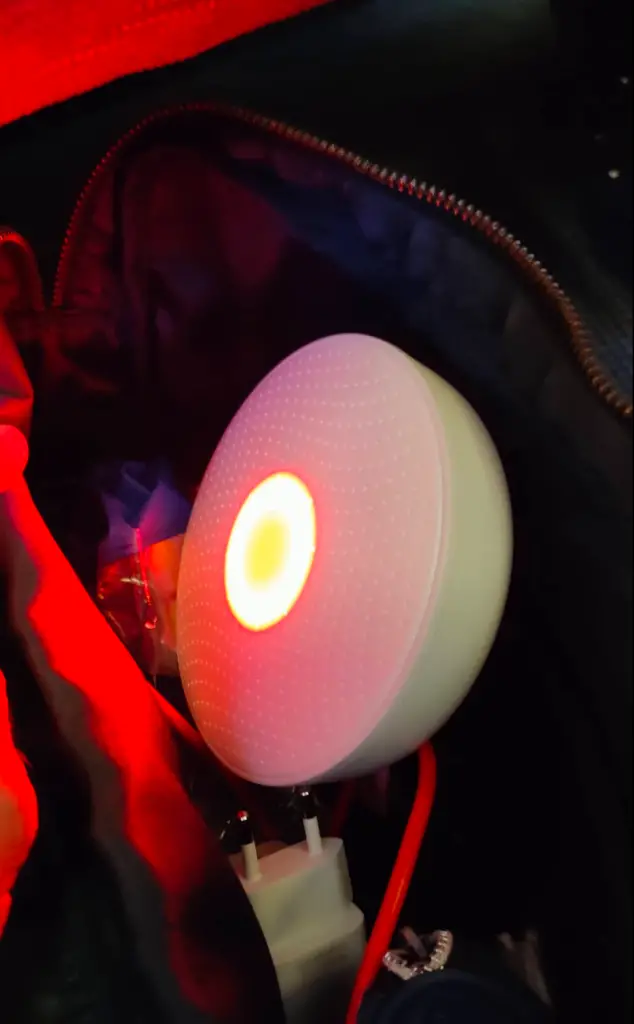
I’ve been taking the larger device – Wave Plus – with me to some of my travels. And it works, just doesn’t paint a very nice picture of the state of ventilation in public spaces…

But looking at it from a Home Automation point of view, moving your gadgets around comes with some caveats.
Any time you move your device around and actually select a new room or location for it, it will empty the history and start a recalibration (according to Airthings, Radon, mold risk and VOC readings are inaccurate before the calibration is done). The new “room” will get a fresh record of data, and the old readings will seemingly disappear.
This means that you can’t easily access the history anymore. Not using the app, anyway.
Airthings doesn’t make this incredibly clear, but the data is in fact not lost! You can still access it using the web interface, and if you have Airthings -integration set up for your Home Assistant, you can obviously still see the values there.
And talking about Home Assistant…
How does it work with Home Assistant?
Unfortunately, it’s a cloud-only integration – and actually a bit backwards at that.
The data synchronization flow looks like this:
- Pair your Airthings devices with the Airthings app using Bluetooth
- Connect to your device with the app using Bluetooth
- Then – and only then – will the app will push new sensor readings to the cloud
- Configure Airthings -integration in your Home Assistant
- The integration will pull the data from the cloud
Of course, you’ll need to add the Airthings-integration to your Home Assistant -instance. But even though you need to register a new app for their developer platform to get an API key, the integration has good guidance on this so I’m not going to go through those steps. That’s not a big hurdle.
After it’s all said and done, you’ll get your devices and an entity for each of their sensors. They’ll be called whatever you named their first locations – so you’ll probably want to use something like “AirthingsWavePlus” or something as the initial location so the name names sense, and you don’t end up with the mess I’m in. My sensors are called something like sensor.kitchen and sensor.office, even though I move them around. And I’m not particularly fond of the thought of changing the entity names often.
As you change the rooms your sensors are in, their visible, “friendly” names get updated, which is definitely a nice touch. Unlike Airthings’s web dashboard, Home Assistant doesn’t stop the measurement, so you’ll have a continuous time value series, even if the sensor has, in fact, moved from one room to another multiple times during the measurements.
How to fix your “Home” location being in Oslo?

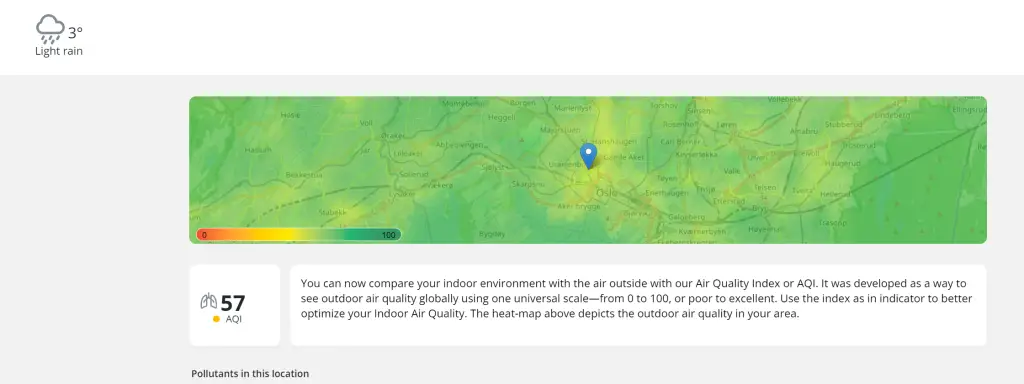
As an interesting side note, Airthings had decided that I live with them – in Oslo. Cute, but I don’t think they should show false data by default :)
I guess this is some sort of a joke by the developers. Airthings is originally from Norway, so maybe they just set everyone to live at their office by default? Talk about the Nordic work-life -balance! Not only do the developers live at the office, but now the customers do, too…

And don’t get me wrong! Their office looks kind of comfortable (below is a definitely-not-photoshopped picture from their Google Business profile). But I’d still like to locate the devices at MY home, not theirs.

Time needed: 10 minutes
How to move your Airthings devices from Oslo to your home?
- Navigate to your Airthings web dashboard
Let’s get started! The first thing to do is to open up your Airthings web dashboard – and even though it looks like it is the same portal that you can access from the app, you can’t actually change the home configuration in the app.
So, find a laptop, tablet or one of those archaic magic machines (a desktop computer is what I think the old people call them), and navigate to: https://dashboard.airthings.com/ - Browse to “Devices”
Your left-hand side navigation should look somewhat like this – click on “Devices”:

- Select a device
Next, you’ll see a list of your devices, under “Home”. Click on one of them.

(you’ll need to eventually do this for all devices, but I’ll treat this tutorial like you only have one – just repeat the steps from here on!) After that, click on “Device Settings” and you should see the device claiming to be at “Home”. That’s a bit misleading – that’s a default home, and that home belongs to Airthings, and it’s located in Oslo!
At least you can just add a new one by clicking “Add location” – see below:
- Add your actual location
I trust you’re big enough to know you shouldn’t give your info out to strangers online. So add an address that you deem acceptable, and call it something like “Home (Not in Oslo)” or “My Home (Not Airthings’) and select “Save Changes”. And then jump back to step 3.

And you should be done with moving the devices to their actual address! You might even get the proper air quality forecast on the dashboard :)
Okay – but what else? What does the Home Assistant integration provide?
Let’s take a closer look at that, next!
What do you get with the Home Assistant integration?
The logic with which Airthings – and the Home Assistant integration – stores information is not perfect.
The Airthings web dashboard will record the readings per room, and any time you change the room, it’ll archive the data and start a new reading. Something like this:


But in Home Assistant, the integration doesn’t really know much about… Anything.
If you only sync occasionally, it doesn’t get the whole history (hence, the data is not very granular), and if you enable continuous synchronization (like I’m doing with an extra tablet device I have at home – you can probably spot it from the graph below!), you’ll get much more granular data, but no information about the room changing. You’ll also need to have a device constantly able to connect to your devices – and it’ll drain the battery from your device and your sensors quicker.
The integration will conveniently update the entity’s name, but the data will be continuous. You’d have to recreate the sensor, which probably would require unpairing and repairing the device with a new name.

This is a bit annoying – whereas their own web service will get proper granularity (i.e. all sensor readings), even if the data is synced only occasionally, Home Assistant won’t. The integration simply doesn’t read historical data.
That said, I still appreciate, especially the Radon and CO2 readings. I compared the CO2 readings with a professional meter I borrowed, and while it didn’t update very quickly, the readings were very close to what the professional device was measuring.
Short review
I guess a longer article like this warrants a short review of the devices. Below, you’ll find my quick notes and findings about Airthings Wave Mini and Wave Plus.
If I was to buy a kit now, I’d get one with the Hub if I could find it affordably, so that I wouldn’t need to have one tablet device constantly polling the 2 (I believe it uses a different frequency to Bluetooth and might have a better range & battery life). I’d look at a kit like this: https://amzn.to/3Y3YbE7
That said, here’s a short review of the products I actually have:
Airthings Wave Mini
Available here: https://amzn.to/3ETR6Pd
Features:
- Temperature
- Humidity
- VOC
- Mold risk
Pros:
- Long battery life(?)
- App feels very functional
- Can be attached to metal surfaces with a magnet – a nice touch
Cons:
- Very limited measurements
- Connectivity via Bluetooth only is very limiting
- Sluggishness of measurement
- Pricey
- You need to use the app to see anything other than green/yellow/red
Airthings Wave Plus
Available here: https://amzn.to/3Ey78Nd
Features:
- Temperature
- Humidity
- VOC
- Radon
- CO2
Pros:
- Very long battery life
- App functions well
- It looks like a UFO (although the mood ring thing doesn’t react as quickly as one would like)
- Can be attached to metal surfaces with a magnet – a nice touch
Cons:
- Same issues with connectivity, app, general sluggishness, and priciness
Finally…
If you run into other promising CO2 sensors (especially if they’re mobile), or if you have questions about these particular ones, leave your experiences in the comments section below! So far, despite the minor annoyance of the weird connectivity solution, I think these gadgets have been worth the price, but you might want to browse Amazon for special sale as I did 😄
The Amazon links on this page are affiliate links, so if you end up purchasing something through them, you support my blog at no extra cost to you. Thanks!


