
This post was most recently updated on December 7th, 2022.
2 min read.This article explains how you can apply formatting and styles from a Microsoft Office Word Document Template (.dotx) to your already existing Word Document (.docx). You might want to do this if you’ve got a file with plenty of content, especially if it’s stuff that might break when copy-pasting (embedded media, pictures with text around them, table of contents, references – actually, anything else than just normal paragraphs).
Took me a while, but this article documents how to do it. Mostly so that I can just come back to it when I need to figure it out next time. In 5 or so years.
Solution
This was somehow more complicated than I thought. I mean – applying a template, shouldn’t that be like a 1-click thing in Microsoft Word? Isn’t that like a thing you do a couple of times a week if you’re actually using Word properly?
I guess… Not. I couldn’t even remember if I had ever done it. Maybe I hadn’t, now that I think about it. But now I figured out how to do it!
Time needed: 10 minutes
Applying a .dotx-template to an existing .docx -file
- Prerequisites
As a prerequisite, you should have a .dotx template file. And a “normal” Word document (.docx). And a burning desire to update the styles in that .docx file with those coming from that .dotx file.
These will suffice. - Enable Developer ribbon
Might seem a bit unintuitive, but in order to properly use templates, you need to enable the “Developer” section of the ribbon. You can do this by navigating to File > Options > Customize Ribbon and then selecting the “Developer” section from the list.
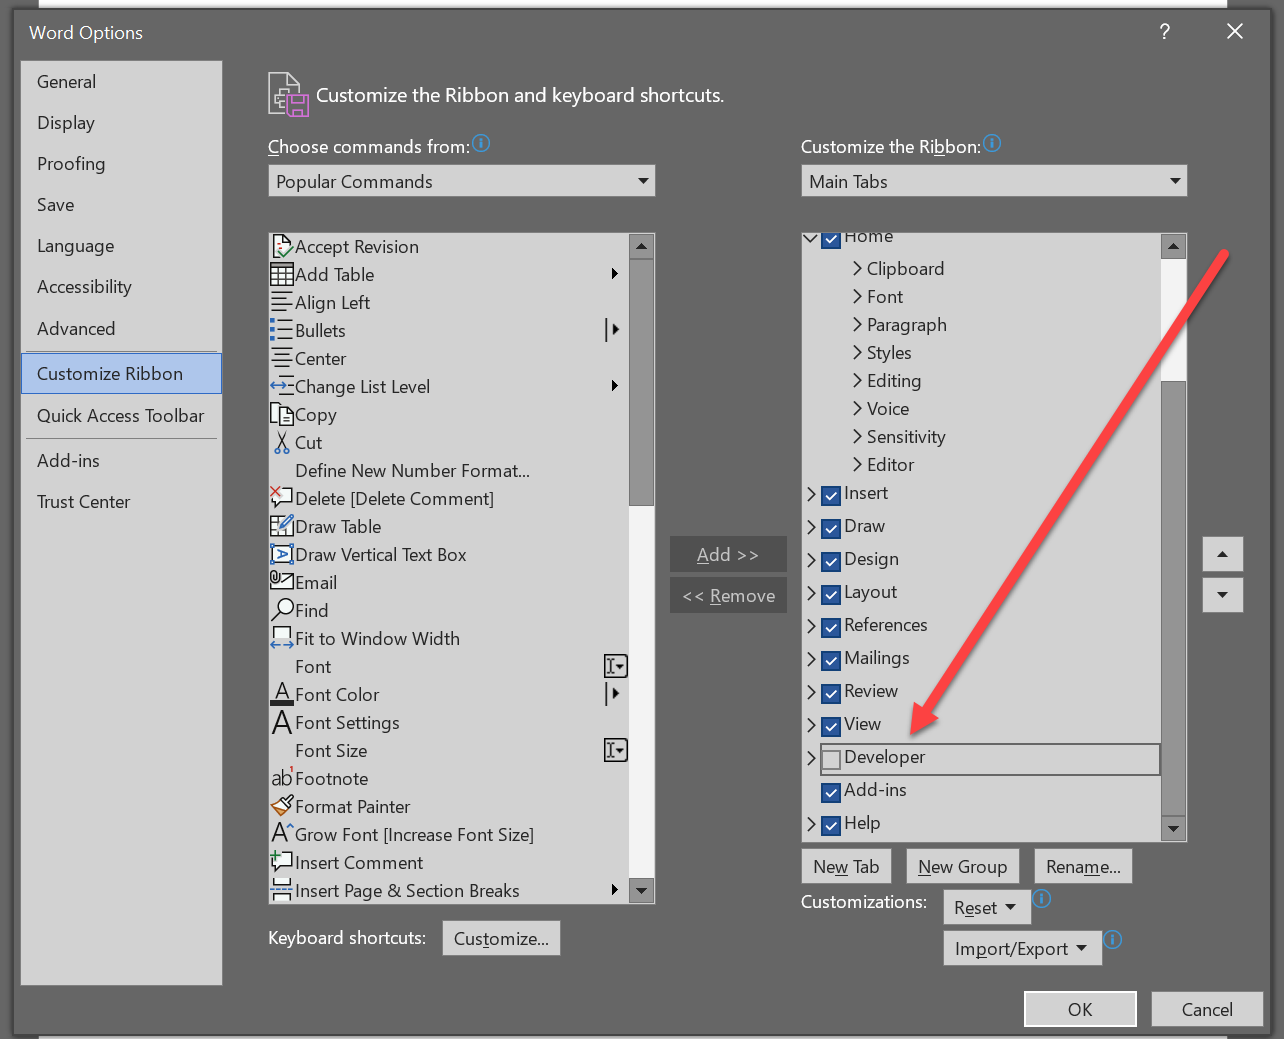
Chances are it’s the only section that’s disabled by default. See – that’s how much Microsoft values us, developers, at the end of the day! 😉 - Select “Templates” > “Document Templates”
Now we’re getting into the real stuff! You should have a new “Developer” tab in your Ribbon, under which you can select “Document Templates”.
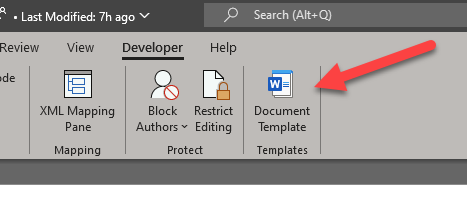
Go ahead and click that button. Or icon. Or whatever it is now called. - And finally – apply the template!
Now we’ll finally get to the point where we actually select a template to apply to our file!
The Dialog that opens by clicking the icon/button/thing in the last step is not as clear as it appears. And it looks about as clear as mud. So that’s a great start.
But we’ll get through this together! Let’s see – below is what the dialog will look like: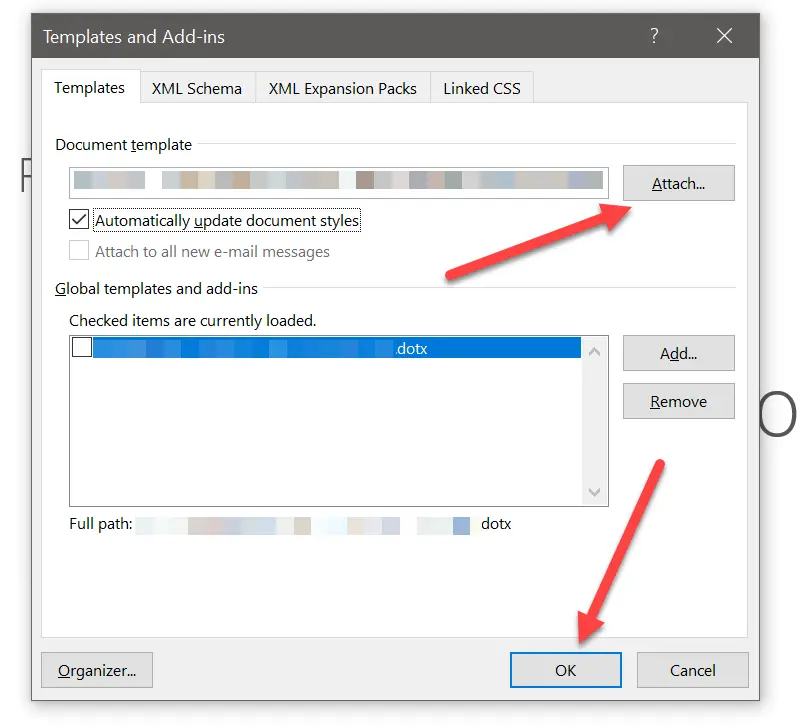
I’ve found the proper way to apply the template to be by clicking the “Attach…” -button, navigating to your .dotx -file from the File Explorer sub-dialog, making sure nothing else is selected in the “Global templates and add-ins”-box, and clicking “OK”.
But if you find a way that works better, let me know!
And there you have it! Now your styles and fonts and all that jazz should match the template. Or that’s my experience anyhow 😀
No matter how it goes, let me know in the comments section below! I’d love to hear if it worked.
He's been a developer from 2004 (starting with PHP and Java), and he's been working on .NET projects, Azure, Office 365, SharePoint and a lot of other stuff. He's also Microsoft MVP for Azure.
This is his personal professional (e.g. professional, but definitely personal) blog.
?")