
Another thing that I run into every now and then is creating CSRs for different customer environments. Since the requests often end up being a bit complex with a lot of SANs (Subject Alternative Names), crafting them with OpenSSL (or other console tools) is a bit laborious for my liking, and I usually just end up generating the CSR in DigiCertUtil or some other UI tool.
And boom – you get a CSR you can copy-paste and send out to the customer/partner/provider.
But what if you need the file later? Or if you need the private key (as you probably will)?
Let’s take a look!
Background
On Windows, any Certificate-Signing Requests (CSR) you’ve created should end up in your local Certificate Store (Certificates MMC snap-in). This is true even if you use some other UI than Microsoft’s Management Console (MMC) or certmgr console tool. Even when using a tool like DigiCertUtil.exe (Digicert’s quite convenient little Certificate Utility app for Windows), the CSRs (and the associated private keys) end up in the Certificate Store that you can access with MMC.
Of course, this doesn’t apply to generating a CSR with OpenSSL. OpenSSL will instead just ask you a lot of questions (or alternatively accept a confusing string of values as arguments). It’s nice, if you remember how to use it and have it installed.
But if you just want to get going quickly, you can export a .pfx -file (which in theory is a CSR with your private key) from Windows Certificate Manager easily.
So all that’s left is to figure out how to find your CSR and export it. Easy, right?
Solution
Let’s go through the steps to export that CSR.
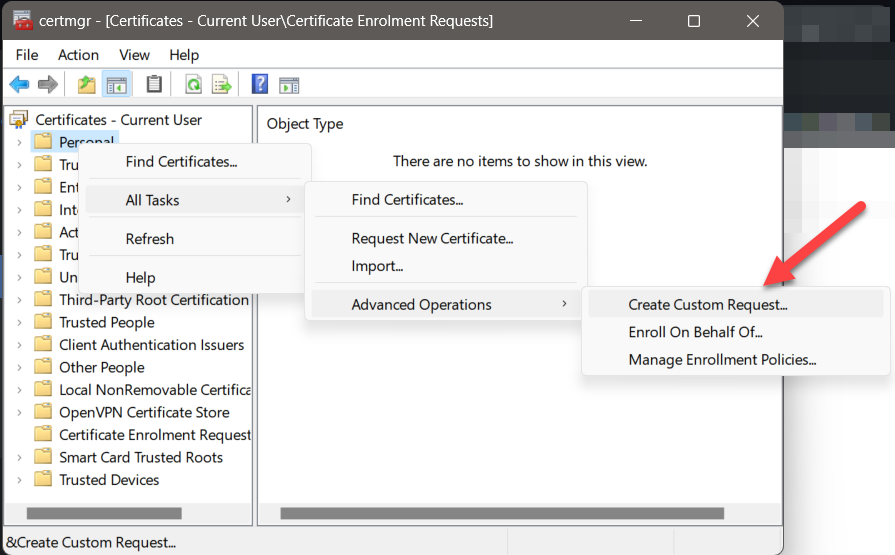
1. Create a CSR
You can do this with DigiCertUtil.exe, or by selecting a certificate store > All Tasks > Advanced Operations > Create Custom Request.
But that’s beyond the scope of this article.
Or perhaps before the scope. Of this article, that is.
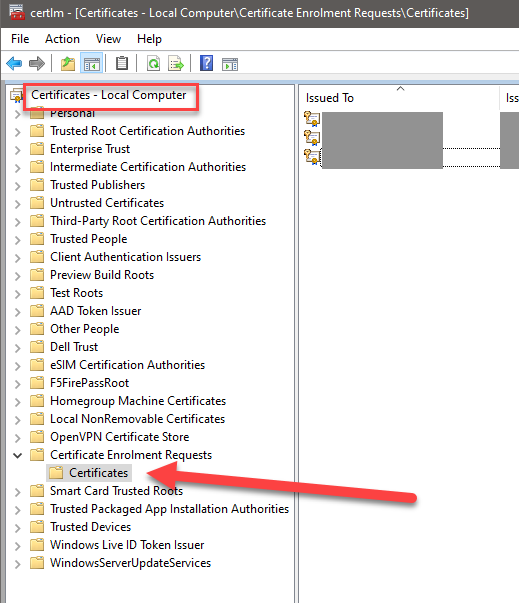
2. Navigate to your CSRs
Navigate to “Certificate Enrolment Requests” > Certificates
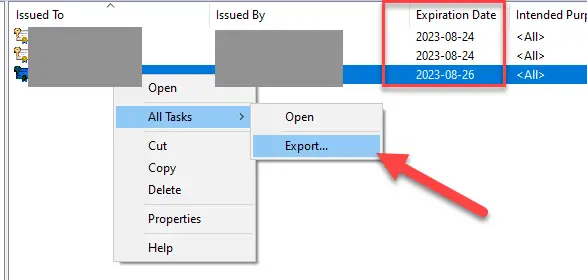
3. Start the export wizard
Select the CSR you want to export, click it with right mouse button > All Tasks > Export
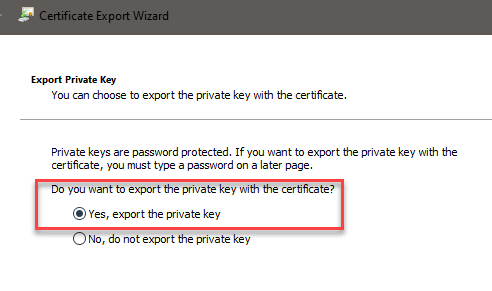
4. Select to export the CSR with the private key
You’ll want the private key to be in the exported file, so please do select “yes” here.
5. Select the export format
In my case, I wanted to have a .pfx -file, as I could easily export the private key from it.
I selected the following options:
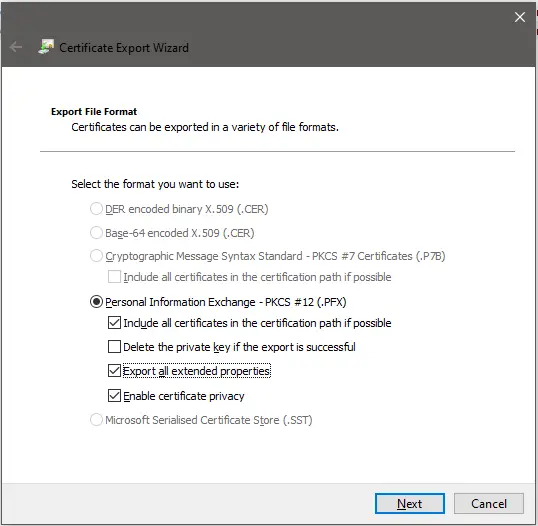
Ét voila! You’ll have a .pfx file with the
References and links
If you want to export the CSR from DigiCertUtil.exe instead, here’s a guide that’s pretty good: https://knowledge.digicert.com/tutorials/export-your-ssl-certificate-using-the-digicert-certificate-utility-pfx-format
… and if you want to export your private key from your .pfx-file, here’s how to do it:
He's been a developer from 2004 (starting with PHP and Java), and he's been working on .NET projects, Azure, Office 365, SharePoint and a lot of other stuff. He's also Microsoft MVP for Azure.
This is his personal professional (e.g. professional, but definitely personal) blog.


