This post was most recently updated on December 10th, 2024.
6 min read.This article explains how to install Home Assistant on your Synology NAS device using Container Manager and Web Station. This probably applies to DSM 7.2+ on any somewhat modern Synology DiskStation device.
A lot of the steps also apply if you’re setting up ANY containers to run on your NAS, to be fair. But let’s not get ahead of ourselves!
Background
I’ve been running my Home Assistant, PiHole and occasionally other services on my local Docker host machine – a HP laptop, running Windows 10, that I got from my first day job when it was retired for old age around 2014 after its planned service life of 3 years + 1-2 years of standing by as a back-up machine.
So the laptop was probably a 2009 or 2010 model. Served me well for a coupe of years, though, and at 40-60 Watts was a little more power-efficient to run than one of my desktop PCs.
Unfortunately, something gave in, and the laptop refused to start anymore. The signs had been showing for a while, but of course I didn’t move the workloads off the burning platform until it was also sinking… 🙃
So I needed to move.
In comes Synology’s DiskStation family NAS – judging from the chatter in the tech spheres online, it seems like everyone and their grandma is using their Network -Attached Storage devices just to run containers.
Problem
Now, Synology is kind of known to be a reputable vendor, but to occasionally introduce some breaking changes. Apparently, also facelifts. Because none of the existing materials I could find about configuring my Home Assistant container to be running on a Synology NAS device had ANYTHING to do with the UI I was facing!
Zero, and I really mean zero steps matched any options I had in my DSM.
Quite frustrating. But it was still nothing a bit of clicking around and retrying the steps that failed by doing exactly the same thing again (Einstein should be turning in his grave).
So, what did I do to get Home Assistant running?
Solution
So, here we go. Let’s go through the step-by-step guide on how to configure Home Assistant to run on your Synology NAS device using Container Manager (so likely on DSM 7.2+).
This guide expects you to already have configured at least one volume for storage.

Time needed: 30 minutes
Guide for running Home Assistant in a Docker container on Synology NAS (DSM 7.2)
- Navigate to your Synology NAS’s web UI
We’ll start by logging into your Synology NAS’s web UI (also called DiskStation Manager). By default, the port is 5000, and only the God knows the IP (also, your router).
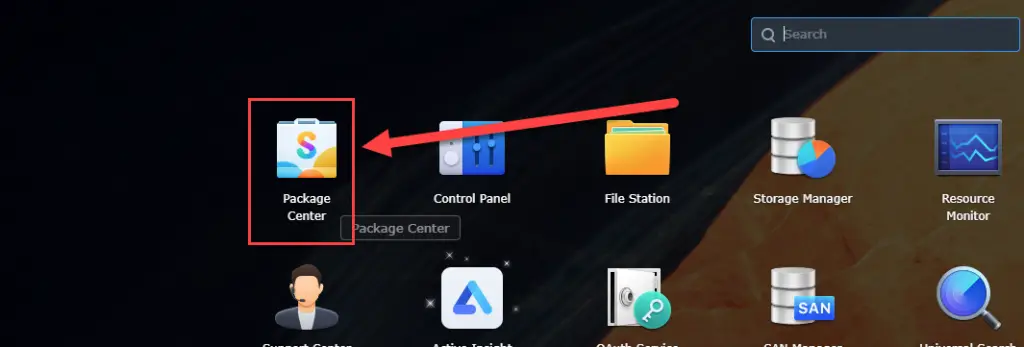
- Open Package Center
You should see “Package Center” by navigating to “Main Menu” in the Web UI.

- Install “Container Manager”
We’ll start by installing Container Manager.
It’s installed for me already – but you’ll find it from the All Packages.
- Make sure “Web Station” is installed too
Another one you’ll need, is “Web Station”.

- Create a folder for Home Assistant
Now we’ll need to create a folder that you can mount for your Home Assistant container in Docker (“Container Manager“).
You can do this in File Station by clicking the shared folder “docker” (it should already exist, thanks to Container Manager) and selecting “Create folder“.
Name it something like “homeassistant“.
- Container Manager > Project > Create
Navigate to Container Manager > Project, and click “Create”. In this pop-up, you can use your old docker-compose yaml file, or create a new one.
We’ll want to create a Project, and not just a “Container” mainly because that way we can configure everything with just one docker-compose file. I guess? Not like I read any documentation on it.
Let’s take a closer look at that in the next step..
- Upload your docker-compose
You could either upload your file, or just copy-paste it in the textarea by selecting “Create docker-compose.yml” in the “Source” dropdown:

You can take a look at the bottom of the page for my samples. - Configure Web portal for homeassistant
Now this is nifty. I guess, it’s actually also very unreliable. But in theory, if you select to “Set up web portal via Web Station”, Synology’s “Web Station” module will take care of port forwarding and expose your Home Assistant instance to the world.
Or at least to your internal network.
In this view you can’t do any weird port mappings, but you can expose the port you’ve exposed in the docker-compose.yml file – in my case, 8123. Something like below (but maybe DO enable the option):
- Verify there’s now a “Web Service” for your Home Assistant container
Fire up the “Web Station” module and navigate to “Web Service”. It should have something like in the picture below – showing your homeassistant (project) to have a containerized script language website configured.
What a nice word salad that is!
Now, it’s worth noticing that you can’t modify the configuration from the Web Station. Not with this model of set-up, anyway.
I suspect it’s possible to just expose the port in the Container Manager but not create a Web Station service for it – and then configure it manually in the Web Station. But Web Station seems like such an odd abstraction away from what we want – i.e., opening ports – that I don’t want to touch it now that it’s functional.
Web Station configuration for your Home Assistant container. Don’t touch it here. - Try navigating to the site you just exposed
Now is the moment of truth. You know your device’s IP address, you know the port (8123 in my case), and you should have the container up and running. Go give it a try in a browser.
If Home Assistant does NOT pop up, check out the next step. - Update Web Portal configuration
Now we’ll want to try and redo the Web Portal configuration.
Navigate to Container Manager > Project > “homeassistant (or whatever you named your project)” > Settings > Web Portal.
Disable and re-enable the web portal configuration there (and verify it looks somewhat like below). Stop your container/project first, though :)
“Funnily” enough, you might need to do the last step a couple of times. I simply reconfigured it by stopping, enabling or disabling the Web Portal, and restarting the container a few times. It certainly did not work the first time.
.. alright. Something like that anyway. I also migrated my earlier set up, but I guess the steps to do that are a bit beyond the scope of this article.
If you got this far, leave a comment telling me which step you struggled with! Or check out my docker-compose.yml file below.
References and appendices
Below are the YAML samples one can use.
Appendix 1: my Windows docker-compose.yml for Home Assistant
This is what I started with. It doesn’t work as is in Synology’s Container Manager, though.
version: '3'
services:
  homeassistant:
    container_name: home-assistant
    image: homeassistant/home-assistant:2023.7
    privileged: true
    network_mode: "bridge"
    volumes:
      - C:/Users/HAL/OneDrive - AdventureWorks/config/HomeAssistant:/config
      - C:/HA_db:/db
    environment:
      - TZ=Europe/Helsinki
    restart: always
    ports:
      - 8123:8123
Appendix 2: my Synology NAS docker-compose.yml for Home Assistant
And here’s what I changed the docker-compose.yml to:
version: '3'
services:
  homeassistant:
    container_name: home-assistant
    image: homeassistant/home-assistant:2023.7
    privileged: true
    network_mode: host
    volumes:
    - /volume1/docker/homeassistant:/config
    - /volume1/docker/HA_db:/db
    environment:
      - TZ=Europe/Helsinki
    restart: always
    ports:
      - 8123:8123
Experiences running Synology NAS so far (17 months)
It makes a clicking sound and produces way more heat than I expected. It’s nothing you’d hear through headphones, but still annoying since my office used to be very silent. I guess I’ve grown used to not having a physical HDD around :)
I got a dedicated tiny server rack, which dampens the noise a lot and the clicking is pretty much gone.
Definitely more reliable than Windows running on a 14-year-old laptop.
In the 17 months I’ve run it so far, it has experienced one unexplainable hang-up, which isn’t that bad.
Not completely. Adding the drives takes a day of verification (for some reason?) and setting up the containers required a bit of back-and-forth, because the Web Station didn’t immediately accept the configuration.
That said, it’s not a lot of work, and it’ll run nicely ever after.
Totally. Worth every penny.


